Showing posts with label natural dyes. Show all posts

Saturday, 5 March 2016

Australian bush leaves for dyes

Ecoprinting with Gina in Sydney

Gina Mastio in her garden
in French's Forest, Sydney

Gina Mastio offered to organise a one day course for me and friends during my visit to Sydney last February. I had met Gina in Lauris during an indigo workshop with Michel Garcia and kept in contact with this soft spoken textile artist...
Some of Gina's ecoprint  pieces


So she invited us to her workshop perched in her house right in the tall trees in French's Forest. We spent a fantastic day on the decks in the middle of the vegetation!

Gina has a passion for plants and permaculture. So with the help of Olivier, her French husband, she set up garden beds all over the back yard to feed the family and the dyeing pots!

So we started the day with a tour of the garden and picked a selection of plants, like this purple basil which gave us a beautiful violet hue.


Sally with a generous piece of bark!


Lily Rose loves cooking but this time prepares
 leaves for the dye pots.
We had collected vegetal material over the days to experiment. Sally brought these pieces of eucalyptus bark amongst lots of other Australian plants from her garden! 


We used a wide variety of gum leaves, ferns, bark, nuts, etc. and boiled them in small jars in a bain marie.


With this array of colours on our swatches, we could now figure out which plant to use for our first eco print pieces. We continued our exploration with bundles. We placed leaves on a silk piece then covered it with a wool piece then bundled the lot like a sanddwich around a tube or stick fastening tightly with rope.
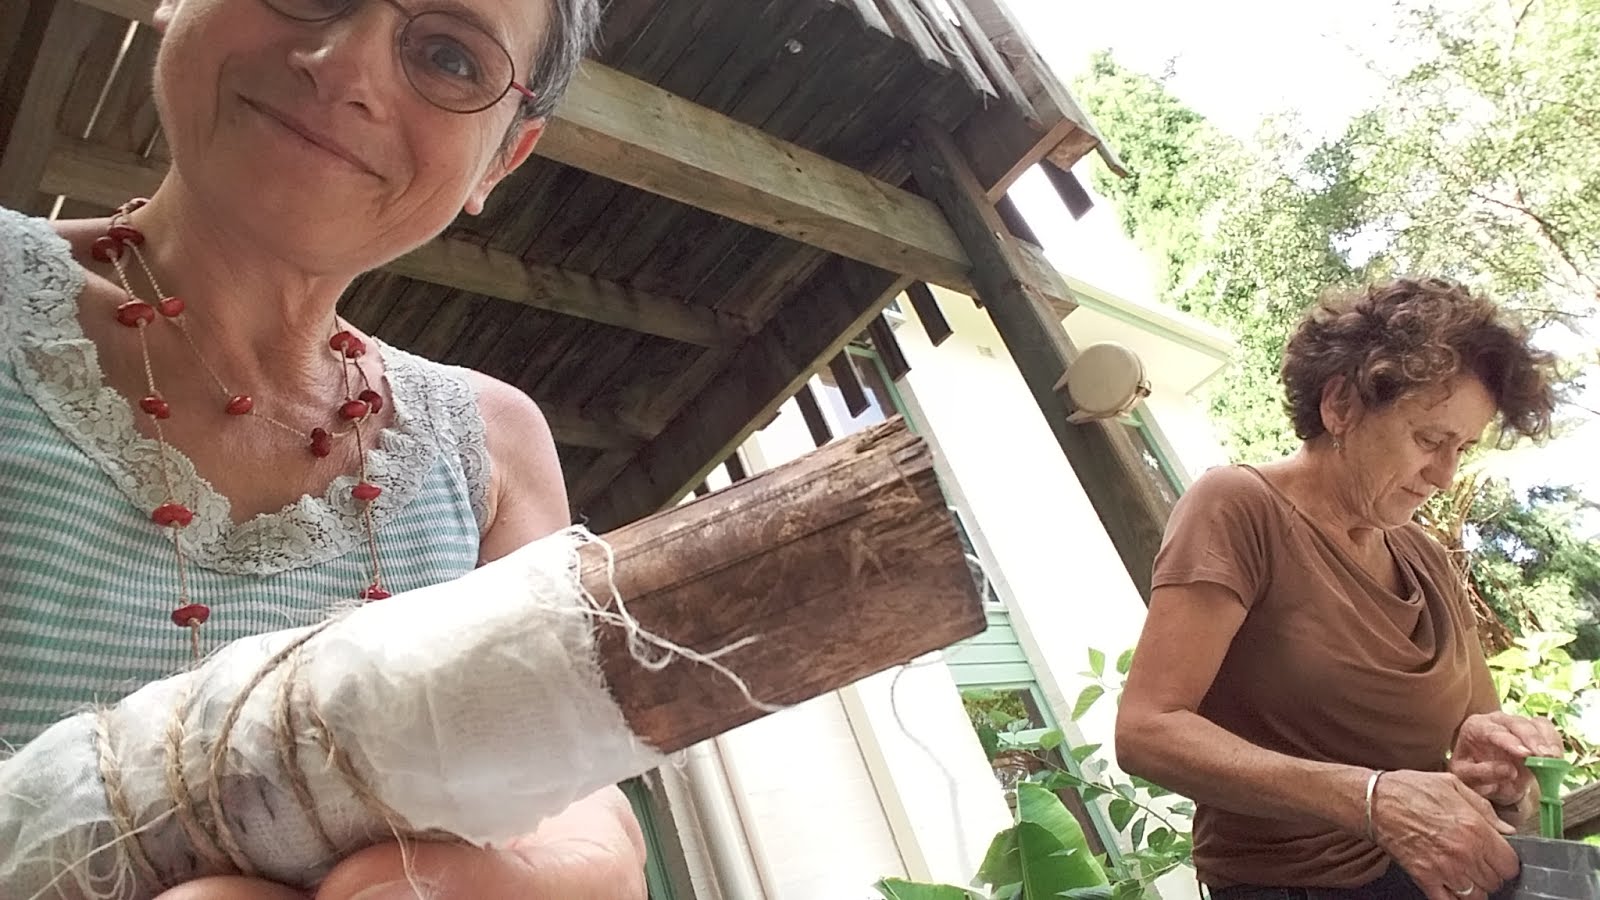


We loaded all these sticks in the big pot, some in the dye bath, partly or whole, some just getting the steam and kept the mixture simmering covered for a good hour. Then comes the surprise to see the result of the combination of minimal planning, random and plant colorings... Cinerea eucalyptus leaves give a lovely bright red;


The next step was to launch into a larger project and dye a scarf of fine merino wool. 

My scarf before folding over and bundling around a bottle.


And the fun comes when you unwrap!


Lily rose, me and Sally
The end of a creative discovery day experimenting with natural dyes in Australia, thanks to Gina!

Sunday, 3 November 2013

Hands on shibori with Yoshiko Wada

Yoshiko Wada explains
intricate shibori techniques in Lauris
Shibori is the memory of folds

Yoshiko launched us into her course with this statement...leaving traces on the fabric. During the International Colour Forum in Lauris this October, Yoshiko held two workshops on Shibori for novices like me.

Folding the fabric regularly, irregularly, or sewing up small sections to prevent parts of the fabrci to enter into contact with the dye: a thousand ways to create textile designs with dyes.

We worked on a piece of silk organza. This very fine fabric is actually fairly stiff for its thickness, because of the presence serecin, a protein substance produced by the silkworms.

Firts we folded the fabric and clamped it with different shapes - I chose the O.


It takes lots of hands to clamp
several pieces together!
Two O plexi shapes are clamped tight on my piece
Then we placed the wetted fabrics in a bath of soda ash.
Contact with the soda ash removed 
the serecin and softened the silk
Yoshiko wraps around my piece for arashi shibori on a PVC down pipe!
Then slides up the fabric tightly and gathers
it in a diagonal direction, tyeing the bundle up with string.
I dyed my piece in a bath of madder, rinsed and dried it.
Then I got carried away and didn't take photos of the arashi result!
Next step, I dyed the piece in indigo and here is the result.

The indigo blue turns out stronger on the serecin ladden spots.
Madder arashi shibori designs come out through the blue in purple brown shades.
Enthusiastic encouraging reaction from Yoshiko
After all these years of experience, Yoshiko still enjoys the surprises of shibori and shares her passion for this technique and natural dyes. 
Watch out it is contagious!

To find out more about Yoshiko's activities here

Sunday, 3 March 2013

Tomoko demonstrates indigo dyeing from Japan

Tomoko maîtrise la teinture a l'indigo
Tomoko commence la démonstration
Tomoko nous parle de teinture a l'indigo depuis un moment, et nous l'avons pris au mot. Pour cette dernière classe avant les congés d'hiver, elle est venue avec tout son matériel.
Tomoko pese la poudre d'indigo,
derriere elle, Nadine Donatti,  notre professeur.


Nous sommes dans la classe de couleur sur textiles de Nadine Donatti aux Ateliers des Beaux Arts de la Ville de Paris.

Tomoko nous vient d'Osaka
Elle habite en France depuis quelques années et elle est venue avec sa passion pour l'indigo. Toujours intéressée par les textiles, elle a commencé a découvrir la teinture et le batik au Japon. Elle a appris les rudiments dans un Centre culturel près de chez elle dans la région d'Osaka.  Elle y allait régulièrement le soir après le travail pour expérimenter... 

En 1995, le grand maître Hakudo Sanada l'a accueillie les week-ends dans son atelier de Hyogo. C'est lui qui a détecté non seulement la passion mais aussi le talent de Tomoko et lui a imparti son savoir-faire.

La recette de Tomoko

Tomoko pèse environ 30g de poudre d'indigo et mouille la poudre avec un peu d'eau froide pour faire une pâte au fond de la cuve, mais l'indigo ne se dissout pas comme cela!


Elle met de la soude caustique dans un bol et verse de l'eau bouillante dessous, en se reculant bien pour ne pas respirer les vapeurs nocives.

Elle ajoute une partie du mélange de soude caustique a la cuve.

Encore de l'eau froide pour remplir le fond de la cuve, puis elle saupoudre quelques cuillerées a soupe d'hydrosulfite de sodium sur le bain.
Surface irisée caractéristique de la cuve d'indigo

 Le bain se métamorphose sous nos yeux. Au bout d'un quart d'heure, de petites bulles qu'on appelle "fleurs d'indigo" au Japon apparaissent et des traces irisées se forment a la surface. C'est bon signe!

Tomoko, toujours aussi concentrée, trempe le premier échantillon de coton dans la cuve, puis le trempe dans une deuxième cuve de rinçage a l'eau claire. 

Du vert, il vire au bleu comme prévu.
Il faut dire que ce n'est pas toujours gagne et que les cuves d'indigo peuvent être ingrates....


Tomoko toute fière de sa cuve d'indigo


Tie Dye frénésie


En attendant, Fleur, GK, Sophie et Brigitte s'affairaient pour nouer leurs pièces de tissu... 


La cuve d'indigo est prête

Florence rince son napperon en coton dans l'eau tiède et le laisse tremper une dizaine de minutes pour qu'il soit bien mouillé en profondeur, puis le sort surtout sans l'essorer et le laisse s’égoutter.. 

Il sera prêt a teindre quand il sera sec a 60% . 

Tomoko place le napperon dans la cuve d'indigo, en prenant soin de le maintenir entièrement submergé pour éviter le contact avec l'air, et en le remuant doucement pour qu'il absorbe bien la couleur. 

Quand le napperon sort de la cuve, il est vert. Tomoko le plonge dans un bac d'eau propre pour le rincer. Progressivement, il devient bleu et prend une belle teinte de bleu profond.
Le napperon, un cadeau de la grand mère de Florence qui l'avait crocheté a son intention, prend une seconde vie.
Chacune prend plaisir a enfiler des gants pour touiller dans la cuve.


Il faudra attendre deux semaines pour découvrir les résultats de nos teintures au retour des congés.


Arigato gozaimasu Tomoko!