Sunday, 26 June 2016

Shibori ribbon for inauguration

Cercles d'indigo pour mon ruban d'atelier

J'ai d'abord plié en deux sur toute sa longueur une bande de tissu en coton biologique. Ensuite je l'ai plié en accordéon pour faire des carrés. Avec des étaux, J'ai amarré et serré très fort deux couvercles de bocaux pour empêcher la couleur du bain de se répandre sur ces cercles et donc les garder blancs.
Les serre joints maintiennent les deux cercles
sur le tissu plié en accordéon
Ensuite, le tissu est prêt pour le bain de teinture, dans ce cas, une cuve d'indigo avec hénné comme réducteur d'oxygène. Pour rappel, l'indigo devient soluble dans l'eau dans un millieu alkalin et sans oxygène, indispensable pour la teinture.
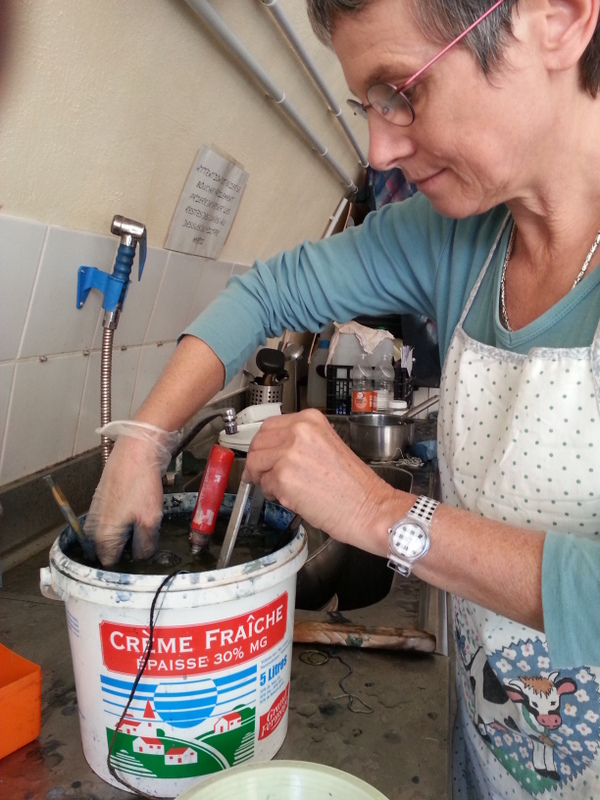
Rien à voir avec de la crème fraiche,
le tissu est trempé dans le bain d'indigo!
Après une bonne heure, le tissu est teint. Le tissu sort du bain vert, puis prend cette belle couleur bleue à l'air car au contact de l'oxygène, l'indigo devient bleu.

Le ruban sort du bain après la première passe
J'ai bien rincé puis laissé sécher un peu avant de retirer le matériel et découvrir les motifs.


Le tissu doit sécher complétement,
si possible à l'ombre. 
Je voulais animer le rond blanc et ne pas le garder uni. Je l'ai encore plié en deux au millieu du cercle et j'ai cousu et froncé le tissu. Petit retrempage partiel dans un peut de bain d'indigo en protégeant bien le reste du travail pour éviter les interférences!
Deuxième bain d'indigo partiel sur la tranche du milieu du cercle blanc
Et on comprend mieux en le voyant
après la sortie de ce deuxième bain.
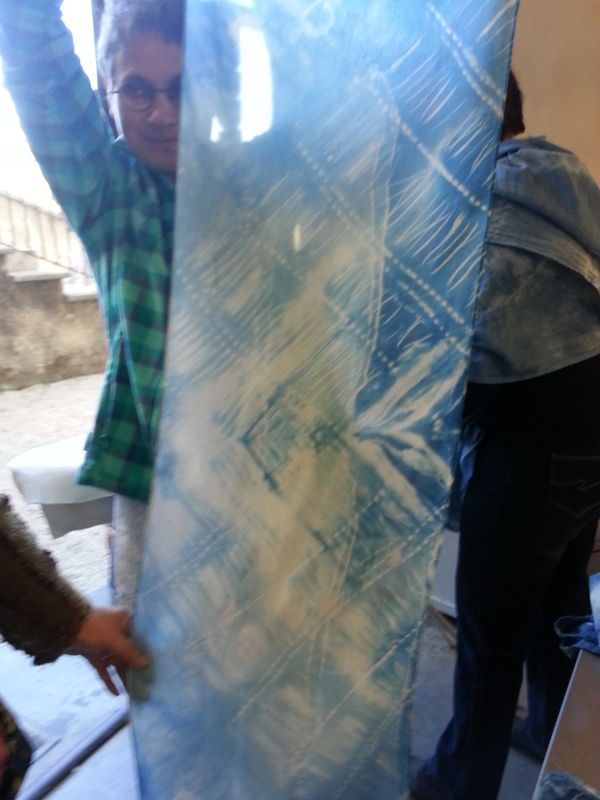
Et puis c'est le moment de la surprise. Toutes mes camarades attendent avec impatience de découvrir le résultat final!

Nous avons coupé le ruban pour inaugurer mon nouvel atelier de Sablet le 18 juin. Chaque invité est reparti avec un morceau de ruban en souvenir.


Un grand moment...
Merci à Franckie pour ses bons conseils lors du stage de Shibori à Lauris. Cliquer ICI

Tuesday, 12 April 2016

Boro, the fabric of life

Reviving threadbare cloths for survival


Kimonos, work clothes, trousers, futon covers... a collection of handmade pieces, repaired, patched, reworked by Japanese farmers between 1850 and 1950. All are made of leftover fabrics reused several times, mostly made of indigo dyed cotton. 
Boro comes from the Japanese onomatopoeic boroboro, which means something tattered or repaired, demonstrates esteem for our available resources, labor and everyday objects.
Boro textiles bring together essential principles of traditional Japanese ethics and aesthetics. They are sober and modest (shibui); imperfections are expressed by irregularity, incompleteness, rawness and simplicity (wabi-sabi); and, of course, regret about any waste (motttainai). All of these are far from today’s consumer driven society.
Arte povera
Until well into the 20th century, large parts of Japan were so poor that people could rarely buy textiles for clothing and bedding. In the North, cotton was precious and pieces of used fabric were purchased to make patch-work clothing or duvets. Many of these textiles had been mended repeatedly from generation to generation without being thrown away.
“Boro textiles were the domain of the ordinary man and represented a collective, impoverished past. They were largely forgotten after the mid-twentieth century when Japan’s society shifted towards mass-scale modernization and urbanization. However, they are the tangible embodiment of a cultural legacy which has only recently been accorded a formal name and has received critical consideration”, explains Mr. Szczepanek a New York based gallerist who collected most of these works. 

Rich patches of old traditional fabrics

The diversity of patches on any given piece is a veritable encyclopedia of hand loomed cotton indigo from old Japan. In most cases, the beautiful arrangement of patches and mending stitches is borne of necessity and happenstance, and was not planned by the maker.
Imagine that boro textiles were stitched in the shadows of farmhouses, often at night by the light of one dim andon, on the laps of farm women. This unselfconscious creative process has yielded hand-made articles of soulful beauty, each of which calls upon to be recognized and admired as more than the utilitarian cloth they were intended to be.

WHEN RECYCLING TELLS A STORY


Moreover, the irregularly patched boro textiles feature a stunning similarity to modern art’s collage aesthetics, reminding today’s viewer of works by artists Paul Klee and Robert Rauschenberg or Brazilian designers Fernando and Humberto Campana. Boro – The Fabric of Life illuminates a little known chapter of craft history and serves as a valuable source of inspiration for today’s designers, artists, aficionados and, last but not least, us as consumers.

Boro – The Fabric of Life
A travelling exhibition organised by CIRECA. The exhibition is designed in cooperation with graduate students from Parsons The New School for Design, New York. Boisbuchet presented this exhibition in 2013, which is now travelling.
http://www.boisbuchet.org/boro-the-fabric-of-life/

Rythme de shibori

Twist and turn for ever


Franckie anime le stage de shibori
de Couleur Garance
De retour au Jardin Conservatoire des Plantes tinctoriales à Lauris ce week end pour un stage de shibori, animé par Franckie Micholin.

C'était une bonne occasion de reprendre les techniques de base de teinture végétale par réserve une à une dans l'atelier de l'Association Couleur Garance.

Styliste de profession,  Franckie pratique la teinture végétale depuis des années. Elle a crée Au fil de la Soie,  un atelier dans la Drôme.

Généreuse et heureuse de partager ses connaissances, elle nous a menées à travers toutes sortes de pliages, torsions de tissu, serrage par pression pour créer à motifs à réserves. 

Un beau chemin de traces, découvertes, surprises à l'infini.

Elastiques et ficelle pour nouer les carrés de tissu
Franckie explique les techniques


Indigo
Une couleur pour le shibori - le bleu qui sera réalisé dans plusieurs cuves. Un cuve au fer pour les cotons et une autre au fructose pour la soie.

Toutes sortes de configurations de tissu roulé, pincé, enroulé se retrouvent dans la cuve!


Le contenu n'a rien a voir avec la crème
 malgré le tablier!

 Le tissu sort vert de la cuve d'indigo puis
 devient progressivement bleu au contact de l'air
Arrive le moment de dérouler et découdre ...
Concentration autour de la table d'opération...
Laurence denoue ses premiers échantillons
Surprise, surprise pour Isabelle aussi


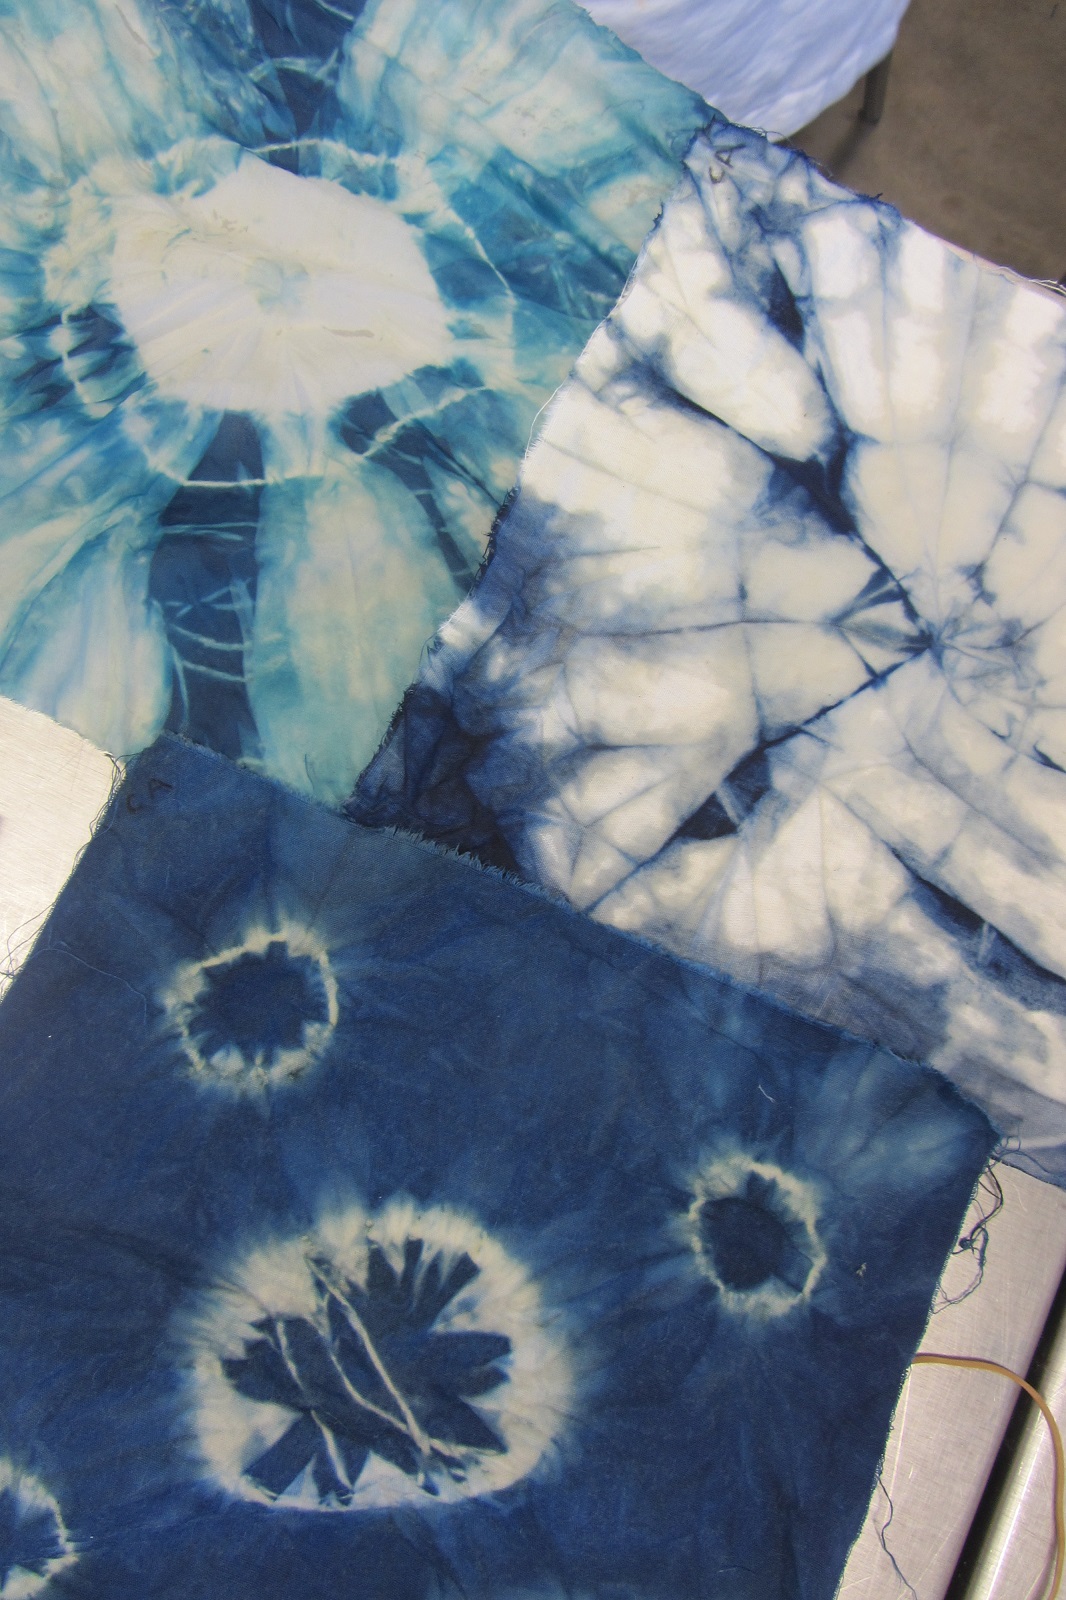
Quelques pliages traditionnels
Graines et morceau de corail noués
Spirale cousue


Tissu plié puis cousu pour ces motifs tout fins


Tout peut laisser une trace!

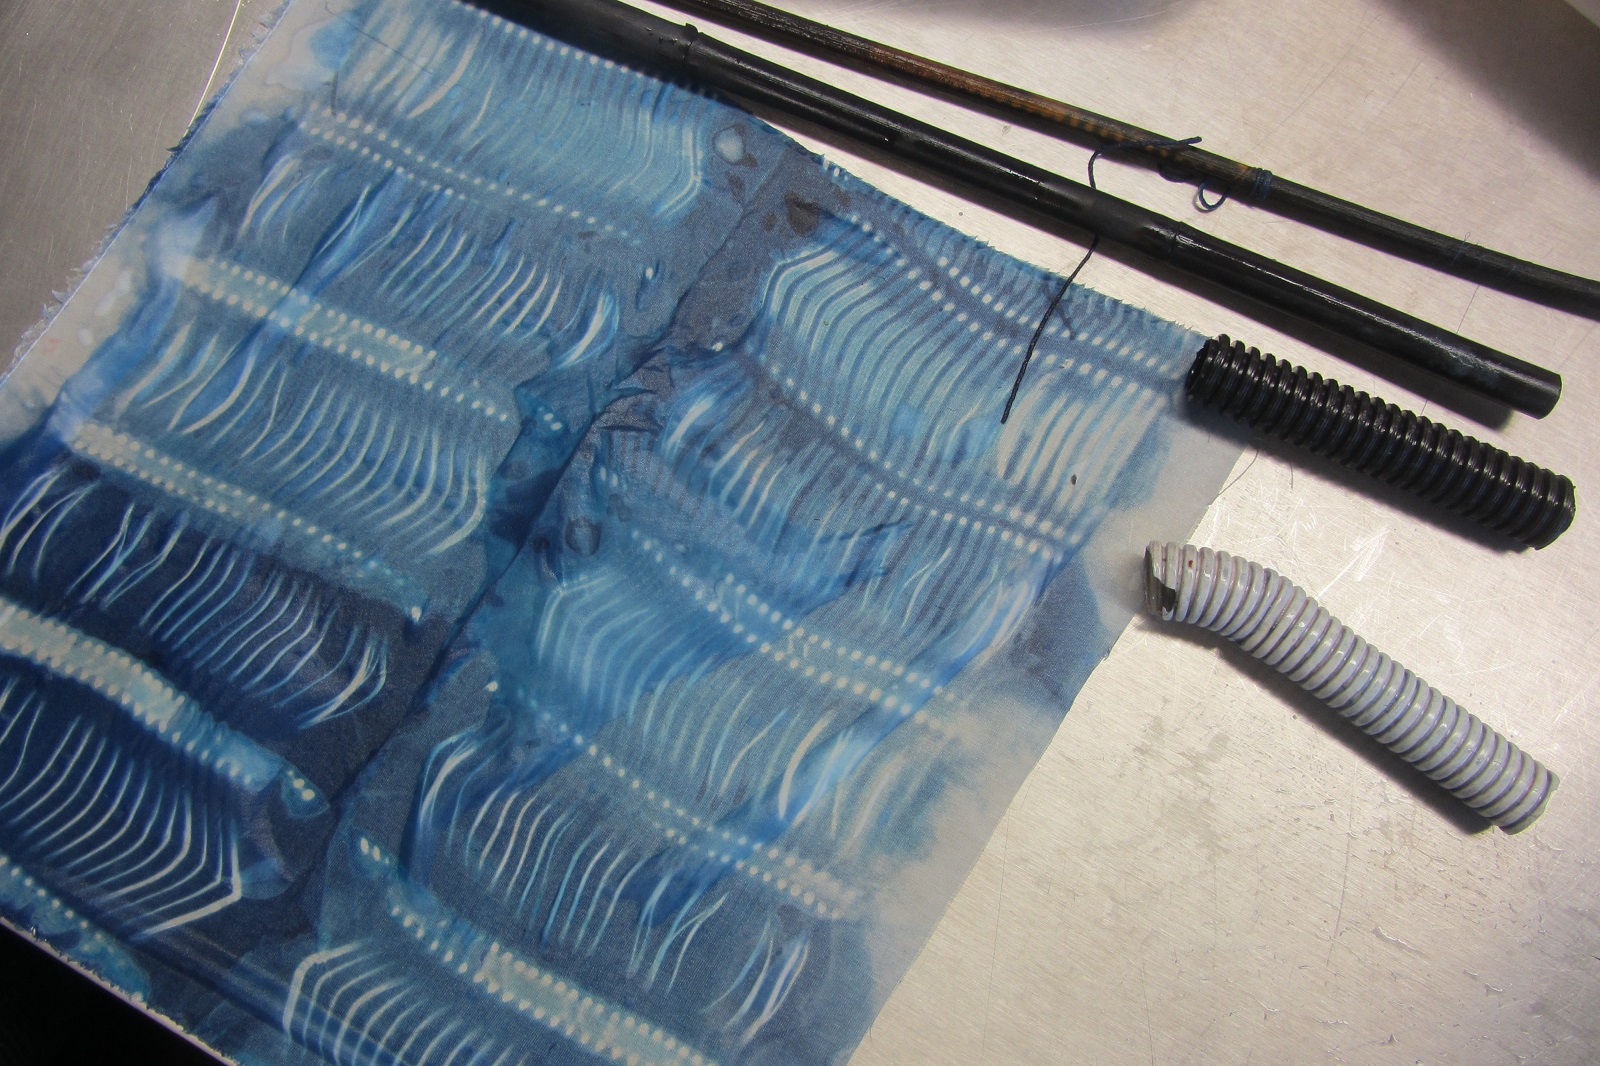
Pourquoi pas utiliser des gaines électriques, des morceaux de bois, expérimenter avec des ficelles de tailles différentes.... la récupération de vieux matériaux est au programme

Carré de soie plié puis enroulé et noué
autour d'un morceau de gaine électrique
 
Deux gaines électriques et deux batons pour les maintenir!
Le résultat est graphique sur ce carré de soie


Roseline fait sécher les pièces,
ensuite elles seront repassées
Quelques échantillons parmi beaucoup d'autres!

Voir cet autre article sur le shibori à Vientiane.

Le début d'une nouvelle aventure de shibori!
Laurence, Paule, Claudine, Isabelle, Muriel, Franckie
et Roseline et Anne


Saturday, 5 March 2016

Australian bush leaves for dyes

Ecoprinting with Gina in Sydney

Gina Mastio in her garden
in French's Forest, Sydney

Gina Mastio offered to organise a one day course for me and friends during my visit to Sydney last February. I had met Gina in Lauris during an indigo workshop with Michel Garcia and kept in contact with this soft spoken textile artist...
Some of Gina's ecoprint  pieces


So she invited us to her workshop perched in her house right in the tall trees in French's Forest. We spent a fantastic day on the decks in the middle of the vegetation!

Gina has a passion for plants and permaculture. So with the help of Olivier, her French husband, she set up garden beds all over the back yard to feed the family and the dyeing pots!

So we started the day with a tour of the garden and picked a selection of plants, like this purple basil which gave us a beautiful violet hue.


Sally with a generous piece of bark!


Lily Rose loves cooking but this time prepares
 leaves for the dye pots.
We had collected vegetal material over the days to experiment. Sally brought these pieces of eucalyptus bark amongst lots of other Australian plants from her garden! 


We used a wide variety of gum leaves, ferns, bark, nuts, etc. and boiled them in small jars in a bain marie.


With this array of colours on our swatches, we could now figure out which plant to use for our first eco print pieces. We continued our exploration with bundles. We placed leaves on a silk piece then covered it with a wool piece then bundled the lot like a sanddwich around a tube or stick fastening tightly with rope.


We loaded all these sticks in the big pot, some in the dye bath, partly or whole, some just getting the steam and kept the mixture simmering covered for a good hour. Then comes the surprise to see the result of the combination of minimal planning, random and plant colorings... Cinerea eucalyptus leaves give a lovely bright red;


The next step was to launch into a larger project and dye a scarf of fine merino wool. 

My scarf before folding over and bundling around a bottle.


And the fun comes when you unwrap!


Lily rose, me and Sally
The end of a creative discovery day experimenting with natural dyes in Australia, thanks to Gina!